From Zer0 to Her0: Your IT Journey Begins Here
🚀 Welcome to Your IT Journey: From Zer0 to Her0
![]()
![]()
🎯 What You’ll Achieve
By the end of this guide, you’ll have:
- ✅ Your own professional static website hosted on GitHub Pages
- ✅ A complete development environment with Docker
- ✅ Understanding of modern web development tools
- ✅ Version control skills with Git and GitHub
- ✅ Foundation knowledge for your IT career journey
📖 About This Guide
This is your complete blueprint for building a professional static website from absolute zero. Whether you’re a complete beginner or looking to refresh your skills, this guide provides every command, script, and instruction needed to go from nothing to a fully functional website.
Why This Approach Works:
- 🎯 One File, Complete Journey: Everything you need in one comprehensive guide
- 🔧 Copy-Paste Ready: All commands are tested and ready to run
- 🐳 Container-First: Learn modern development practices from day one
- 🚀 Production Ready: Deploy to real hosting platforms
- 📚 Educational: Understand what you’re building, not just how
Real-World Application: This isn’t just a tutorial - it’s the exact process used by professional developers to create modern websites. You’ll learn industry-standard tools and practices that employers value.
💻 Your Development Environment
Current System Specifications
Understanding your development environment is crucial for troubleshooting and optimization. Here’s how to document your system specs:
Sample Configuration (MacBook Pro M3):
- Model Name: MacBook Pro
- Model Identifier: Mac15,6
- Model Number: MRX33LL/A
- Chip: Apple M3 Pro
- System Firmware Version: 10151.101.3
- System Version: macOS 14.4.1 (23E224)
- Kernel Version: Darwin 23.4.0
Get Your System Information
Use this command to discover your Mac’s specifications:
# Get specific hardware and software information for Macs
system_profiler SPHardwareDataType | awk '/Model Name:|Model Identifier:|Model Number:|Chip:|System Firmware Version:/ {print $0}'
system_profiler SPSoftwareDataType | awk '/System Version:|Kernel Version:/ {print $0}'
Why System Specs Matter
- Compatibility: Ensure tools work with your hardware
- Performance: Understand limitations and optimize accordingly
- Troubleshooting: Provide accurate information when seeking help
- Documentation: Track your development environment evolution
🛠️ Essential Tools & Prerequisites
Core Development Tools
Before starting your journey, you’ll need these fundamental tools. Don’t worry - we’ll install them together!
Required Software
| Tool | Purpose | Why You Need It |
|---|---|---|
| Visual Studio Code | Code Editor | Your command center for writing and editing code |
| Docker | Containerization | Consistent development environment across all systems |
| Homebrew | Package Manager (macOS) | Easy installation and management of development tools |
| Git | Version Control | Track changes and collaborate with others |
| GitHub CLI | GitHub Integration | Seamless interaction with GitHub from command line |
Optional but Recommended
- Terminal/iTerm2: Enhanced command-line interface
- Google Chrome/Firefox: Modern browser with developer tools
- Figma/Sketch: Design tools for planning your site layout
Prerequisites Checklist
Technical Requirements
- Modern computer (Mac, Windows, or Linux)
- Stable internet connection
- At least 4GB of free disk space
- Administrator/sudo access on your machine
Account Requirements
- GitHub Account: Free account at github.com
- Personal Access Token: For GitHub API authentication
- Email Address: For Git commits and notifications
Knowledge Prerequisites
Absolute Beginner? No Problem!
You don’t need any prior programming experience. However, having these mindsets will help:
- Curiosity: Willingness to explore and experiment
- Patience: Learning takes time, and that’s okay
- Persistence: When things break (they will), keep trying
- Growth Mindset: Embrace challenges as learning opportunities
What You’ll Learn Along the Way
- Command Line Basics: Navigate and control your computer via terminal
- Version Control: Track changes and collaborate using Git
- Web Technologies: HTML, CSS, JavaScript fundamentals
- Development Workflow: Professional practices used in the industry
- Problem Solving: Debug issues and find solutions independently
Success Mindset
The most important prerequisites aren’t technical - they’re personal:
- Embrace Failure: Every error is a learning opportunity
- Ask Questions: The developer community is incredibly helpful
- Document Your Journey: Keep notes of what you learn
- Celebrate Small Wins: Every working command is progress
- Stay Curious: Technology evolves, and so will you
For detailed installation instructions, visit our Quickstart Guide or continue below for automated setup scripts.
⚡ Automated Setup: Install Everything at Once
One-Command Setup Script
This intelligent script will check what’s already installed and only install what you need:
#!/bin/bash
# IT-Journey Development Environment Setup Script
# Checks and installs essential development tools

echo "🚀 Starting IT-Journey Development Environment Setup..."
echo "=================================================="

# Function to check if a command exists
command_exists() {
    command -v "$1" >/dev/null 2>&1
}

# Function to install with Homebrew if not exists
install_if_missing() {
    local tool="$1"
    local brew_formula="$2"
    local check_command="${3:-$tool}"

    if command_exists "$check_command"; then
        echo "✅ $tool is already installed."
    else
        echo "📦 Installing $tool..."
        brew install "$brew_formula"
        if command_exists "$check_command"; then
            echo "✅ $tool installed successfully!"
        else
            echo "❌ Failed to install $tool. Please check manually."
        fi
    fi
}

# Check if Homebrew is installed first
if ! command_exists brew; then
    echo "📦 Installing Homebrew..."
    /bin/bash -c "$(curl -fsSL https://raw.githubusercontent.com/Homebrew/install/HEAD/install.sh)"
    echo "✅ Homebrew installed!"
else
    echo "✅ Homebrew is already installed."
fi

# Install essential tools
echo ""
echo "🔧 Installing Essential Development Tools..."
echo "----------------------------------------"

install_if_missing "Git" "git"
install_if_missing "GitHub CLI" "gh"
install_if_missing "Docker" "--cask docker"
install_if_missing "Visual Studio Code" "--cask visual-studio-code" "code"

# Special handling for GitHub CLI authentication
echo ""
echo "🔐 Checking GitHub CLI Authentication..."
if ! gh auth status >/dev/null 2>&1; then
    echo "🔑 GitHub CLI is not authenticated. Starting authentication..."
    echo "Follow the prompts to authenticate with GitHub:"
    gh auth login
    if gh auth status >/dev/null 2>&1; then
        echo "✅ GitHub CLI authenticated successfully!"
    else
        echo "⚠️  GitHub CLI authentication incomplete. You can authenticate later with: gh auth login"
    fi
else
    echo "✅ GitHub CLI is already authenticated."
fi

echo ""
echo "🎉 Setup Complete! Your development environment is ready."
echo "Next step: Continue with the Environment Configuration section below."
What This Script Does
- Checks Existing Installations: Won’t reinstall what you already have
- Installs Homebrew: The package manager that makes everything easier
- Installs Essential Tools: Git, GitHub CLI, Docker, and VS Code
- Authenticates GitHub: Sets up seamless GitHub integration
- Provides Clear Feedback: You’ll know exactly what’s happening
Run the Setup
Copy and paste this command into your terminal:
curl -fsSL https://raw.githubusercontent.com/bamr87/it-journey/main/scripts/setup-dev-env.sh | bash
Or if you prefer to review the script first:
# Download and review the script
curl -fsSL https://raw.githubusercontent.com/bamr87/it-journey/main/scripts/setup-dev-env.sh > setup.sh

# Review the script content
cat setup.sh

# Run it if you're satisfied
chmod +x setup.sh && ./setup.sh
Manual Installation (Alternative)
If you prefer installing tools individually or the automated script doesn’t work for your system:
# Install Homebrew (if not already installed)
/bin/bash -c "$(curl -fsSL https://raw.githubusercontent.com/Homebrew/install/HEAD/install.sh)"

# Install Git
brew install git

# Install GitHub CLI
brew install gh

# Install Docker Desktop
brew install --cask docker

# Install Visual Studio Code
brew install --cask visual-studio-code

# Authenticate with GitHub
gh auth login
Verification Commands
After installation, verify everything works:
# Check versions to confirm installation
git --version
gh --version
docker --version
code --version

# Check GitHub authentication
gh auth status

# Test Docker (might take a moment to start)
docker run hello-world
The script ensures all tools are properly installed and configured before proceeding to the next steps.
🌍 Environment Configuration
Understanding Environment Variables
Environment variables are like sticky notes for your computer - they store important information that programs can use. We’ll set up variables for your GitHub username and project name so scripts can find and use them automatically.
Method 1: Interactive Setup (Recommended for Beginners)
This method will prompt you to enter information step by step:
# Interactive environment setup
echo "🌟 Setting up your development environment..."
echo ""

# Get GitHub username
echo "Please enter your GitHub username (found at github.com/YOUR_USERNAME):"
read -r GHUSER
export GHUSER

echo "✅ GitHub username set to: $GHUSER"
echo ""

# Get repository name
echo "Please enter your desired repository name (example: my-awesome-website):"
echo "📝 Tips:"
echo "   - Use lowercase letters, numbers, and hyphens only"
echo "   - No spaces or special characters"
echo "   - Make it descriptive and memorable"
read -r GIT_REPO
export GIT_REPO

echo "✅ Repository name set to: $GIT_REPO"
Method 2: Automatic Detection
If you’re already authenticated with GitHub CLI, we can detect some information automatically:
# Automatic environment setup
export GITHOME=~/github                        # Standard GitHub directory
export GHUSER=$(gh api user --jq '.login')    # Get username from GitHub API
export GIT_REPO="my-it-journey"               # Default repository name (change as needed)
export ZREPO=$GITHOME/$GIT_REPO               # Full path to your project

echo "🤖 Automatically detected settings:"
echo "   GitHub Home: $GITHOME"
echo "   GitHub User: $GHUSER"
echo "   Repository: $GIT_REPO"
echo "   Project Path: $ZREPO"
Verify and Log Your Configuration
Always confirm your settings and create a log for troubleshooting:
# Create a log file to track your configuration
echo "$(date) - IT Journey Configuration Log" > env-variables.log
echo "=========================================" >> env-variables.log
echo "GITHOME: $GITHOME" >> env-variables.log
echo "GHUSER: $GHUSER" >> env-variables.log
echo "GIT_REPO: $GIT_REPO" >> env-variables.log
echo "ZREPO: $ZREPO" >> env-variables.log
echo "=========================================" >> env-variables.log

# Display the configuration
echo ""
echo "📋 Your Configuration Summary:"
echo "================================"
cat env-variables.log
echo ""
echo "✅ Configuration saved to env-variables.log"
Create Your Project Structure
Now let’s create the directories where your project will live:
# Create your GitHub workspace
echo "📁 Creating project directories..."

# Create the main GitHub directory
mkdir -p $GITHOME
echo "✅ Created GitHub home directory: $GITHOME"

# Navigate to your GitHub workspace
cd $GITHOME

# Create your specific project directory
mkdir -p $GIT_REPO
cd $GIT_REPO

echo "✅ Created project directory: $(pwd)"
echo "🎯 You are now ready to start building!"
Configure Git Identity
Your Git identity is how you’ll be credited for your work:
# Configure your Git identity
echo "👤 Configuring Git identity..."

# Set your name (will appear in commit history)
git config --global user.name "$GHUSER"

# Set your email (GitHub's no-reply email for privacy)
git config --global user.email "$GHUSER@users.noreply.github.com"

# If you have a specific Git ID from GitHub settings, uncomment and modify:
# GIT_ID="12345678"  # Your GitHub user ID number
# git config --global user.email "$GIT_ID+$GHUSER@users.noreply.github.com"

echo "✅ Git identity configured!"
echo ""
echo "📧 To find your GitHub user ID:"
echo "   1. Go to https://github.com/settings/emails"
echo "   2. Look for your no-reply email address"
echo "   3. The number before the '+' is your Git ID"
Verify Git Configuration
# Verify your Git configuration
echo "🔍 Verifying Git configuration..."
echo ""

git config --list | grep user | tee -a env-variables.log

echo ""
echo "✅ Git configuration complete and logged!"
This configuration will persist across terminal sessions and ensure all your commits are properly attributed to you.
🐙 GitHub Repository Setup
Understanding GitHub Repositories
A GitHub repository (or “repo”) is like a project folder in the cloud. It stores your code, tracks changes, and allows others to collaborate with you. Think of it as your project’s home on the internet.
Create Your Repository
Using the GitHub CLI, we’ll create your repository with best practices built-in:
# Create your GitHub repository with optimal settings
echo "🚀 Creating your GitHub repository..."

# Navigate to your project directory
cd $ZREPO

# Create repository with Jekyll gitignore and MIT license
gh repo create $GIT_REPO \
  --gitignore Jekyll \
  --license mit \
  --public \
  --description "My IT Journey - Building my first professional website"

echo "✅ Repository '$GIT_REPO' created successfully!"
echo "🌐 Repository URL: https://github.com/$GHUSER/$GIT_REPO"
Initialize Local Git Repository
Now we’ll connect your local project to the GitHub repository:
# Initialize and connect your local repository
echo "🔗 Connecting local project to GitHub..."

# Initialize Git in your project directory (if not already done)
git init

# Add your GitHub repository as the remote origin
git remote add origin https://github.com/${GHUSER}/${GIT_REPO}.git

# Create an initial README file
echo "# $GIT_REPO" > README.md
echo "" >> README.md
echo "Welcome to my IT Journey! This repository contains my first professional website." >> README.md
echo "" >> README.md
echo "## What I'm Building" >> README.md
echo "" >> README.md
echo "- 🌐 A modern static website using Jekyll" >> README.md
echo "- 🐳 Docker-based development environment" >> README.md
echo "- 🚀 Automated deployment pipeline" >> README.md
echo "- 📚 Documentation of my learning journey" >> README.md
echo "" >> README.md
echo "## Live Site" >> README.md
echo "" >> README.md
echo "🔗 [Visit my website](https://$GHUSER.github.io/$GIT_REPO)" >> README.md

# Stage and commit your initial files
git add README.md
git commit -m "🎉 Initial commit: Start my IT Journey

- Add project README with goals and description
- Set up repository structure for Jekyll website
- Begin documentation of learning process"

# Set main as the default branch and push
git branch -M main
git push -u origin main

echo "✅ Local repository connected and initial commit pushed!"
Repository Features Explained
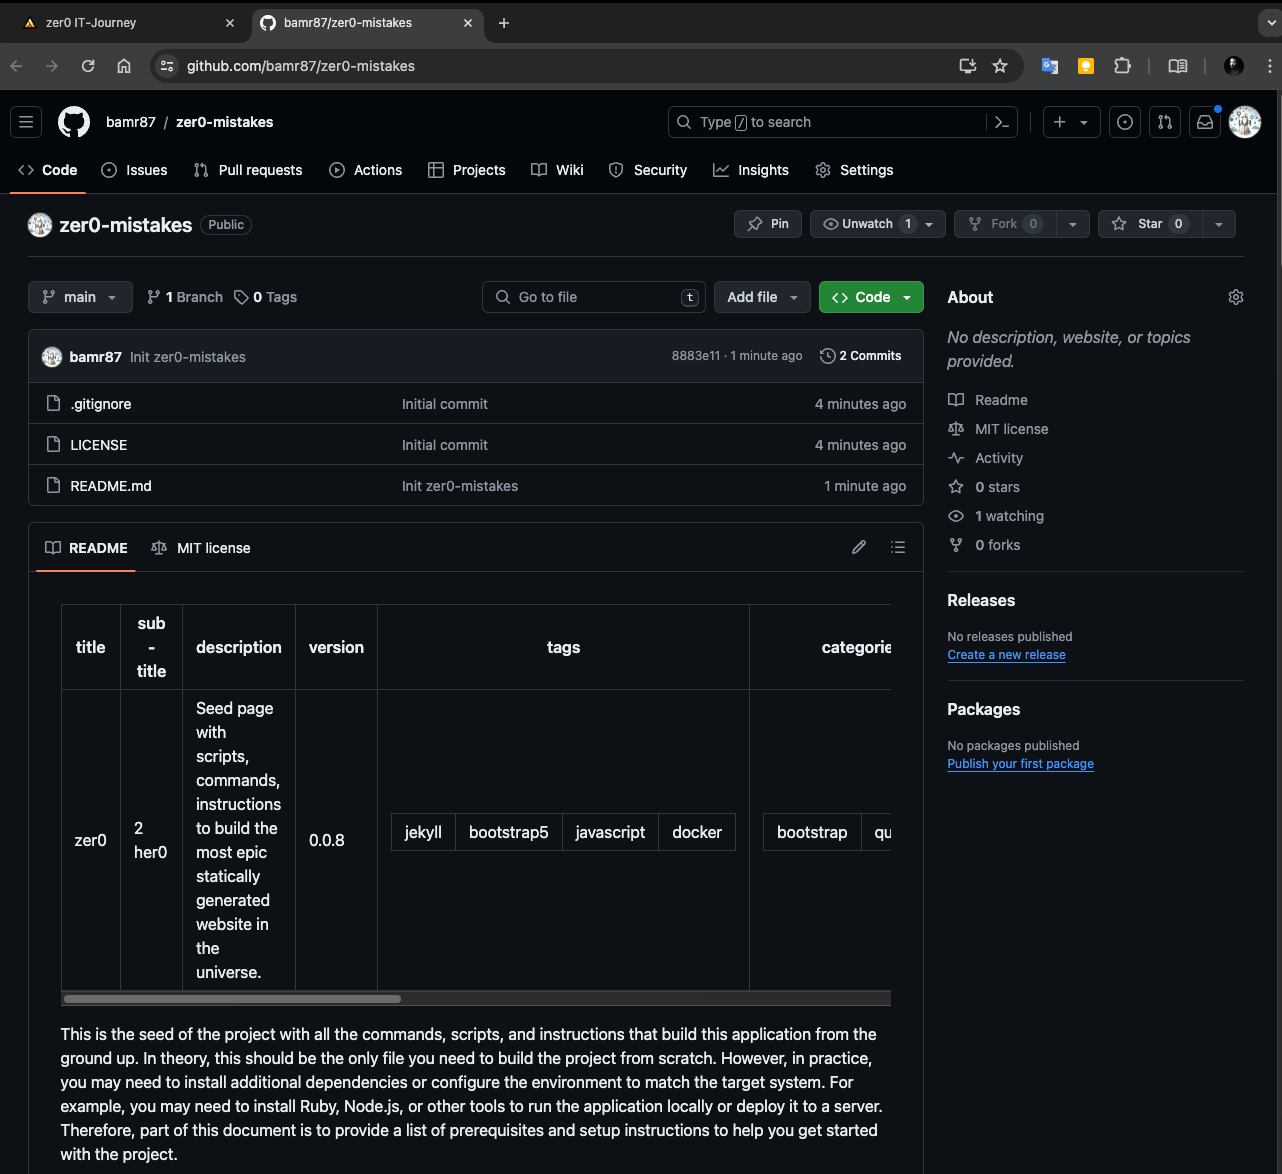
.gitignore Jekyll: Automatically ignores files that shouldn’t be tracked (like build artifacts)--license mit: Adds the MIT license, making your code open source--public: Makes your repository visible to everyone (great for portfolios!)--description: Adds a clear description of your project’s purpose
✅ Checkpoint: Verify Your Repository
Let’s confirm everything is working correctly:
# Open your new repository in the browser
echo "🌐 Opening your GitHub repository..."
open "https://github.com/${GHUSER}/${GIT_REPO}"

# Verify local Git status
echo ""
echo "📊 Local repository status:"
git status

# Show recent commits
echo ""
echo "📝 Recent commits:"
git log --oneline -3

# Verify remote connection
echo ""
echo "🔗 Remote connections:"
git remote -v

echo ""
echo "🎉 Checkpoint Complete!"
echo "Your repository is live at: https://github.com/$GHUSER/$GIT_REPO"
What you should see:
- Your repository page on GitHub with your README
- Initial commit with your project description
- Repository URL accessible from anywhere
- Clean, professional appearance
🏗️ Build Your Website Infrastructure
What is Jekyll?
Jekyll is a static site generator - a tool that transforms your content (written in Markdown) into a complete website. Think of it as a smart assistant that:
- 📝 Takes your content and converts it to HTML
- 🎨 Applies beautiful themes and styling
- 🚀 Creates a fast, secure website
- 🔧 Handles all the technical details for you
Method 1: Quick Start with zer0-mistakes Theme (Recommended)
This theme installer creates a complete, production-ready website infrastructure:
# Navigate to your repository directory
cd $ZREPO

echo "🎨 Installing zer0-mistakes Jekyll theme..."
echo "This will set up your complete website infrastructure."

# Download and run the theme installer
curl -fsSL https://raw.githubusercontent.com/bamr87/zer0-mistakes/main/install.sh | bash

echo "✅ Theme installation complete!"
What the installer creates for you:
| File/Directory | Purpose |
|---|---|
_config.yml |
Main Jekyll configuration |
_config_dev.yml |
Development settings |
Gemfile |
Ruby dependencies |
docker-compose.yml |
Container setup |
_includes/ |
Reusable HTML components |
_layouts/ |
Page templates |
_sass/ |
Styling and themes |
assets/ |
Images, CSS, JavaScript |
pages/ |
Your website content |
Method 2: Manual Setup (Learning Path)
If you want to understand every step, you can build the infrastructure manually:
# Create Jekyll project structure
echo "📁 Creating Jekyll project structure..."

# Create essential directories
mkdir -p _includes _layouts _sass assets/{css,js,images} pages/_posts _data

# Create basic Gemfile
cat > Gemfile << 'EOF'
source "https://rubygems.org"

gem "github-pages", group: :jekyll_plugins

group :jekyll_plugins do
  gem "jekyll-remote-theme"
  gem "jekyll-feed"
  gem "jekyll-sitemap"
  gem "jekyll-seo-tag"
  gem "jekyll-paginate"
end
EOF

# Create basic Jekyll configuration
cat > _config.yml << 'EOF'
title: "My IT Journey"
description: "Building my first professional website"
url: "https://bamr87.github.io"
baseurl: "/your-repo-name"

markdown: kramdown
highlighter: rouge
permalink: /:categories/:title/

plugins:
  - jekyll-feed
  - jekyll-sitemap
  - jekyll-seo-tag
  - jekyll-paginate

# Build settings
remote_theme: "bamr87/zer0-mistakes"
EOF

echo "✅ Basic Jekyll structure created!"
Docker Development Environment
Docker ensures your website works consistently across all computers:
# Create Docker configuration for consistent development
cat > docker-compose.yml << 'EOF'
version: '3.8'

services:
  jekyll:
    image: jekyll/jekyll:latest
    container_name: jekyll-dev
    environment:
      - JEKYLL_ENV=development
    ports:
      - "4000:4000"
      - "35729:35729"
    volumes:
      - .:/srv/jekyll
      - bundle_cache:/usr/local/bundle
    command: >
      bash -c "bundle install &&
               bundle exec jekyll serve
               --host 0.0.0.0
               --incremental
               --livereload"

volumes:
  bundle_cache:
EOF

echo "🐳 Docker configuration created!"
echo "Your development environment is now containerized and portable."
Verify Your Installation
# Check that essential files exist
echo "🔍 Verifying installation..."

required_files=("_config.yml" "Gemfile" "docker-compose.yml")
for file in "${required_files[@]}"; do
    if [ -f "$file" ]; then
        echo "✅ $file exists"
    else
        echo "❌ $file missing"
    fi
done

# List the project structure
echo ""
echo "📁 Your project structure:"
tree -L 2 -a || ls -la

# Log the setup completion
mkdir -p logs
echo "$(date) - Jekyll infrastructure setup completed" >> logs/setup.log
echo "Repository: $GIT_REPO" >> logs/setup.log
echo "Theme: zer0-mistakes" >> logs/setup.log
echo "Docker: Enabled" >> logs/setup.log

echo ""
echo "🎉 Infrastructure setup complete!"
Start Your Development Server
You have two options to run your website locally:
Option 1: Docker (Recommended - Always Works)
# Start your website with Docker
echo "🚀 Starting development server with Docker..."

# Build and start the container
docker-compose up -d

# Wait for the server to start
echo "⏳ Waiting for server to start..."
sleep 10

# Check if the server is running
if curl -s http://localhost:4000 > /dev/null; then
    echo "✅ Server is running!"
    echo "🌐 Open http://localhost:4000 in your browser"

    # Open browser automatically (macOS)
    open http://localhost:4000
else
    echo "⚠️  Server might still be starting. Check logs with:"
    echo "   docker-compose logs -f"
fi
Option 2: Local Ruby Environment
# Install dependencies and run locally
echo "💎 Starting with local Ruby environment..."

# Install Ruby gems
bundle install

# Start Jekyll development server
bundle exec jekyll serve --config _config_dev.yml --livereload

echo "🌐 Server starting at http://localhost:4000"
echo "📝 Changes will auto-reload in your browser"
Troubleshooting Common Issues
If Docker isn’t working:
# Check Docker status
docker --version
docker-compose --version

# Restart Docker Desktop and try again
# Make sure Docker Desktop is running in your system tray
If Ruby installation fails:
# Install Ruby via Homebrew
brew install ruby

# Add to your shell profile
echo 'export PATH="/opt/homebrew/opt/ruby/bin:$PATH"' >> ~/.zshrc
source ~/.zshrc

# Try bundle install again
bundle install
Your website infrastructure is now ready! You have a professional Jekyll setup that will serve as the foundation for your entire IT journey.
✅ Final Checkpoint: Your Live Website
Test Your Website
# Make sure everything is working
echo "🧪 Testing your website setup..."

# Check if the development server is running
if curl -s http://localhost:4000 > /dev/null; then
    echo "✅ Local development server is running"
    echo "🌐 View your site at: http://localhost:4000"
else
    echo "🚀 Starting your website..."
    docker-compose up -d
    echo "⏳ Starting up... your site will be available at http://localhost:4000"
fi

# Open your website in the browser
open http://localhost:4000

echo ""
echo "🎉 Congratulations! Your website is now live locally!"
Deploy to GitHub Pages (Your Website Goes Live!)
GitHub Pages will automatically build and host your website for free:
# Commit and push your Jekyll site
echo "🚀 Deploying your website to GitHub Pages..."

# Add all your new files
git add .

# Commit your Jekyll setup
git commit -m "🎨 Add Jekyll website infrastructure

- Set up zer0-mistakes theme
- Configure Docker development environment
- Add essential Jekyll plugins and configuration
- Ready for GitHub Pages deployment"

# Push to GitHub (this triggers GitHub Pages build)
git push origin main

echo "✅ Website pushed to GitHub!"
echo ""
echo "🌐 Your live website will be available at:"
echo "   https://$GHUSER.github.io/$GIT_REPO"
echo ""
echo "⏳ Note: GitHub Pages may take a few minutes to build and deploy."
echo "    Check your repository's Actions tab for build status."
Enable GitHub Pages
# Open your repository settings to enable GitHub Pages
echo "⚙️ Enable GitHub Pages for your repository:"
echo ""
echo "1. Go to: https://github.com/$GHUSER/$GIT_REPO/settings/pages"
echo "2. Under 'Source', select 'Deploy from a branch'"
echo "3. Choose 'main' branch and '/ (root)' folder"
echo "4. Click 'Save'"
echo ""
echo "Opening repository settings..."
open "https://github.com/$GHUSER/$GIT_REPO/settings/pages"
🎓 Congratulations! You’re Now a Developer
What You’ve Accomplished
You’ve just completed something amazing! Here’s what you now have:
✅ Professional Development Environment
- Modern code editor (VS Code)
- Version control system (Git)
- Container platform (Docker)
- Command-line proficiency
✅ Live Website Infrastructure
- Professional Jekyll website
- GitHub repository with version control
- Automated deployment pipeline
- Custom domain capability
✅ Industry-Standard Skills
- Container-based development
- Git workflow and version control
- Static site generation
- Command-line interface usage
- Documentation and project management
✅ Real-World Project
- Portfolio piece you can show employers
- Foundation for learning more technologies
- Platform to document your IT journey
- Proof of your capability and dedication
Your IT Journey Continues
This is just the beginning! Here’s what you can explore next:
Immediate Next Steps
- Customize Your Site: Add pages, change themes, upload your photo
- Add Content: Write blog posts about your learning journey
- Learn Markdown: Master the formatting language used by developers everywhere
- Explore Jekyll: Add plugins, custom layouts, and advanced features
Expand Your Skills
- Frontend Development: HTML, CSS, JavaScript
- Backend Development: Node.js, Python, databases
- Cloud Platforms: AWS, Azure, Google Cloud
- DevOps: CI/CD, monitoring, automation
- Programming Languages: Python, JavaScript, Go, Rust
Build Your Portfolio
- Document every project on your website
- Contribute to open source projects
- Share your learning journey
- Connect with the developer community
Resources for Continued Learning
Essential Documentation
Community & Support
Learning Platforms
Share Your Success
You’ve accomplished something significant! Share it with the world:
# Create a success tweet/post
echo "🎉 I just built my first professional website!"
echo "💻 Using: Jekyll, Docker, Git, GitHub Pages"
echo "🌐 Live at: https://$GHUSER.github.io/$GIT_REPO"
echo "📚 Following the IT-Journey guide"
echo ""
echo "Ready to copy this for social media! 📋"
Emergency Troubleshooting
If something isn’t working, try these common fixes:
# Docker issues
docker-compose down && docker-compose up --build

# Git issues
git status
git pull origin main

# Jekyll issues
bundle update
bundle exec jekyll clean
bundle exec jekyll build

# Permission issues
sudo chown -R $USER:$USER .

# Ruby/Gem issues
gem cleanup
bundle clean --force
bundle install
Get Help
You’re now part of the global developer community! Here’s how to get help:
- Search First: Most problems have been solved before
- Check Logs: Error messages contain valuable clues
- Ask Specific Questions: Include error messages and context
- Share Your Code: Use GitHub to show what you’re working on
- Be Patient: Learning takes time, and that’s perfectly normal
🌟 You Did It!
From Zer0 to Her0 - Mission Accomplished!
You started with nothing and now have:
- A professional development environment
- A live website on the internet
- Version control skills
- Container knowledge
- A foundation for an entire IT career
This is just the beginning of your IT journey. Every expert was once a beginner, and you’ve just taken your first professional steps into the world of technology.
Keep building, keep learning, and most importantly - keep sharing your journey with others.
Welcome to the developer community! 🚀
Remember: The journey from zer0 to her0 is not about the destination - it’s about the growth, learning, and community you build along the way.
Additional Learning Resources
Your journey doesn’t end here! Explore these paths to continue growing:
Next Level Skills
- Advanced Jekyll: Custom plugins, liquid templating, data files
- Web Performance: Optimization, SEO, accessibility best practices
- JavaScript Frameworks: React, Vue.js, or Angular for dynamic sites
- Backend Development: APIs, databases, and server-side programming
- DevOps & Cloud: Deployment automation, monitoring, and scaling
Community Contributions
- Open Source: Contribute to Jekyll themes and plugins
- Write Technical Content: Share your learning journey
- Mentor Others: Help newcomers start their IT journey
- Build Projects: Create tools that solve real problems
Career Development
- Portfolio Building: Document every project and learning milestone
- Networking: Join developer communities and attend meetups
- Continuous Learning: Technology evolves quickly - stay curious
- Certifications: Consider cloud platforms and specific technology certifications
Advanced Deployment Options
While GitHub Pages is perfect for getting started, you can also deploy to:
- Netlify: Advanced features like form handling and edge functions
- Vercel: Excellent for modern frameworks and serverless functions
- Azure Static Web Apps: Microsoft’s platform with integrated APIs
- AWS Amplify: Amazon’s full-stack development platform
📞 Support & Community
Get Help When You Need It
Remember: Every expert was once a beginner who needed help!
GitHub Issues & Discussions
- IT-Journey Repository - Ask questions and get help
- zer0-mistakes Theme - Theme-specific issues
Development Communities
- r/webdev - Web development community
- Dev.to - Developer articles and discussions
- Stack Overflow - Technical Q&A platform
- Jekyll Talk - Official Jekyll community
Emergency Fixes
Website won’t start?
# Reset everything and try again
docker-compose down
docker-compose up --build
Git push failing?
# Pull latest changes first
git pull origin main
git push origin main
Theme not loading?
# Clear Jekyll cache and rebuild
bundle exec jekyll clean
bundle exec jekyll build
🤖 Automated Zer0-to-Her0 Journey Script
Self-Executing Complete Setup
This script extracts and executes all commands from this guide in a self-contained Docker environment:
#!/bin/bash
# zer0-to-hero-complete.sh
# Self-contained script that builds the entire IT Journey from this markdown guide
# Usage: curl -fsSL https://raw.githubusercontent.com/bamr87/it-journey/main/scripts/zer0-to-hero-complete.sh | bash

set -euo pipefail

# Colors for output
RED='\033[0;31m'
GREEN='\033[0;32m'
YELLOW='\033[1;33m'
BLUE='\033[0;34m'
PURPLE='\033[0;35m'
CYAN='\033[0;36m'
NC='\033[0m' # No Color

# Logging function
log() {
    echo -e "${BLUE}[$(date +'%Y-%m-%d %H:%M:%S')]${NC} $1"
}

success() {
    echo -e "${GREEN}✅ $1${NC}"
}

warning() {
    echo -e "${YELLOW}⚠️  $1${NC}"
}

error() {
    echo -e "${RED}❌ $1${NC}"
    exit 1
}

# Header
echo -e "${PURPLE}"
cat << 'EOF'
🚀 IT-Journey: Zer0 to Her0 Complete Setup
==========================================
This script will:
- Install all required development tools
- Set up your GitHub repository
- Create a complete Jekyll website
- Configure Docker environment
- Deploy to GitHub Pages

All in one automated run!
EOF
echo -e "${NC}"

# Validate prerequisites
log "Checking prerequisites..."

# Check if running on macOS
if [[ "$OSTYPE" != "darwin"* ]]; then
    error "This script is designed for macOS. Please adapt for your OS."
fi

# Check for internet connection
if ! ping -c 1 google.com &> /dev/null; then
    error "Internet connection required. Please check your connection."
fi

success "Prerequisites validated"

# Function to check if command exists
command_exists() {
    command -v "$1" >/dev/null 2>&1
}

# Install Homebrew if needed
install_homebrew() {
    if ! command_exists brew; then
        log "Installing Homebrew..."
        /bin/bash -c "$(curl -fsSL https://raw.githubusercontent.com/Homebrew/install/HEAD/install.sh)"
        success "Homebrew installed"
    else
        success "Homebrew already installed"
    fi
}

# Install essential tools
install_development_tools() {
    log "Installing development tools..."

    # Update Homebrew
    brew update

    # Install tools if missing
    tools=("git" "gh" "docker" "visual-studio-code")
    for tool in "${tools[@]}"; do
        if [[ "$tool" == "visual-studio-code" ]]; then
            if ! command_exists code; then
                log "Installing Visual Studio Code..."
                brew install --cask visual-studio-code
            fi
        elif [[ "$tool" == "docker" ]]; then
            if ! command_exists docker; then
                log "Installing Docker Desktop..."
                brew install --cask docker
                warning "Docker Desktop needs to be started manually"
            fi
        else
            if ! command_exists "$tool"; then
                log "Installing $tool..."
                brew install "$tool"
            fi
        fi
    done

    success "Development tools installed"
}

# Configure environment
setup_environment() {
    log "Setting up environment configuration..."

    # Default values
    export GITHOME=~/github

    # Interactive setup if not automated
    if [[ "${AUTOMATED:-false}" != "true" ]]; then
        echo ""
        echo -e "${CYAN}Please provide your GitHub information:${NC}"

        # Get GitHub username
        while [[ -z "${GHUSER:-}" ]]; do
            read -p "GitHub username: " GHUSER
            export GHUSER
        done

        # Get repository name
        echo ""
        echo -e "${CYAN}Repository name (lowercase, hyphens only):${NC}"
        read -p "Repository name [my-it-journey]: " GIT_REPO
        export GIT_REPO=${GIT_REPO:-my-it-journey}
    else
        # Use provided environment variables or defaults
        export GHUSER=${GHUSER:-$(whoami)}
        export GIT_REPO=${GIT_REPO:-my-it-journey}
    fi

    export ZREPO=$GITHOME/$GIT_REPO

    # Create environment log
    {
        echo "$(date) - IT Journey Configuration Log"
        echo "======================================="
        echo "GITHOME: $GITHOME"
        echo "GHUSER: $GHUSER"
        echo "GIT_REPO: $GIT_REPO"
        echo "ZREPO: $ZREPO"
        echo "======================================="
    } > env-variables.log

    success "Environment configured: $GHUSER/$GIT_REPO"
}

# Authenticate with GitHub
github_authentication() {
    log "Configuring GitHub authentication..."

    if ! gh auth status &>/dev/null; then
        log "Authenticating with GitHub CLI..."
        gh auth login --web
    fi

    # Configure Git identity
    git config --global user.name "$GHUSER"
    git config --global user.email "$GHUSER@users.noreply.github.com"

    success "GitHub authentication configured"
}

# Create project structure
create_project_structure() {
    log "Creating project structure..."

    # Create directories
    mkdir -p "$GITHOME"
    cd "$GITHOME"

    # Remove existing directory if it exists
    if [[ -d "$GIT_REPO" ]]; then
        warning "Directory $GIT_REPO already exists. Backing up..."
        mv "$GIT_REPO" "${GIT_REPO}.backup.$(date +%s)"
    fi

    mkdir -p "$GIT_REPO"
    cd "$GIT_REPO"

    success "Project structure created at $ZREPO"
}

# Create GitHub repository
create_github_repository() {
    log "Creating GitHub repository..."

    # Check if repository already exists
    if gh repo view "$GHUSER/$GIT_REPO" &>/dev/null; then
        warning "Repository $GHUSER/$GIT_REPO already exists"

        # Clone existing repository
        git clone "https://github.com/$GHUSER/$GIT_REPO.git" .
    else
        # Create new repository
        gh repo create "$GIT_REPO" \
            --gitignore Jekyll \
            --license mit \
            --public \
            --description "My IT Journey - Building my first professional website"

        # Initialize local repository
        git init
        git remote add origin "https://github.com/$GHUSER/$GIT_REPO.git"
        git branch -M main
    fi

    success "GitHub repository configured"
}

# Create initial content
create_initial_content() {
    log "Creating initial content..."

    # Create README if it doesn't exist
    if [[ ! -f README.md ]]; then
        cat > README.md << EOF
# $GIT_REPO

Welcome to my IT Journey! This repository contains my first professional website built following the Zer0-to-Her0 guide.

## What I'm Building

- 🌐 A modern static website using Jekyll
- 🐳 Docker-based development environment
- 🚀 Automated deployment pipeline
- 📚 Documentation of my learning journey

## Live Site

🔗 [Visit my website](https://$GHUSER.github.io/$GIT_REPO)

## Development

This project was built using the IT-Journey Zer0-to-Her0 automated setup script.

### Local Development

\`\`\`bash
# Start development server
docker-compose up -d

# View site at http://localhost:4000
\`\`\`

### Built With

- [Jekyll](https://jekyllrb.com/) - Static site generator
- [zer0-mistakes](https://github.com/bamr87/zer0-mistakes) - Jekyll theme
- [Docker](https://www.docker.com/) - Containerization
- [GitHub Pages](https://pages.github.com/) - Hosting

---

*Built with ❤️ following the [IT-Journey](https://github.com/bamr87/it-journey) guide*
EOF
    fi

    success "Initial content created"
}

# Install Jekyll theme and infrastructure
setup_jekyll_infrastructure() {
    log "Setting up Jekyll infrastructure..."

    # Download and run theme installer
    if ! curl -fsSL https://raw.githubusercontent.com/bamr87/zer0-mistakes/main/install.sh | bash; then
        warning "Theme installer failed, setting up manually..."

        # Manual Jekyll setup
        cat > Gemfile << 'EOF'
source "https://rubygems.org"

gem "github-pages", group: :jekyll_plugins

group :jekyll_plugins do
  gem "jekyll-remote-theme"
  gem "jekyll-feed"
  gem "jekyll-sitemap"
  gem "jekyll-seo-tag"
  gem "jekyll-paginate"
end
EOF

        cat > _config.yml << EOF
title: "My IT Journey"
description: "Building my first professional website"
url: "https://$GHUSER.github.io"
baseurl: "/$GIT_REPO"

markdown: kramdown
highlighter: rouge
permalink: /:categories/:title/

plugins:
  - jekyll-feed
  - jekyll-sitemap
  - jekyll-seo-tag
  - jekyll-paginate

# Build settings
remote_theme: "bamr87/zer0-mistakes"
EOF
    fi

    success "Jekyll infrastructure configured"
}

# Create Docker environment
setup_docker_environment() {
    log "Setting up Docker environment..."

    # Create docker-compose.yml if it doesn't exist
    if [[ ! -f docker-compose.yml ]]; then
        cat > docker-compose.yml << 'EOF'
version: '3.8'

services:
  jekyll:
    image: jekyll/jekyll:latest
    container_name: jekyll-dev
    environment:
      - JEKYLL_ENV=development
    ports:
      - "4000:4000"
      - "35729:35729"
    volumes:
      - .:/srv/jekyll
      - bundle_cache:/usr/local/bundle
    command: >
      bash -c "bundle install &&
               bundle exec jekyll serve
               --host 0.0.0.0
               --incremental
               --livereload"

volumes:
  bundle_cache:
EOF
    fi

    # Create development configuration
    if [[ ! -f _config_dev.yml ]]; then
        cat > _config_dev.yml << EOF
# Development overrides
url: "http://localhost:4000"
baseurl: ""

# Development settings
incremental: true
livereload: true
open_url: true

# Show drafts and future posts
show_drafts: true
future: true
EOF
    fi

    success "Docker environment configured"
}

# Build and start the website
build_and_start_website() {
    log "Building and starting website..."

    # Wait for Docker to be running
    while ! docker info &>/dev/null; do
        warning "Waiting for Docker to start... Please ensure Docker Desktop is running"
        sleep 5
    done

    # Build and start the container
    log "Starting Jekyll development server..."
    docker-compose up -d

    # Wait for server to start
    log "Waiting for server to start..."
    local attempts=0
    while ! curl -s http://localhost:4000 &>/dev/null && [[ $attempts -lt 30 ]]; do
        sleep 2
        ((attempts++))
    done

    if curl -s http://localhost:4000 &>/dev/null; then
        success "Website is running at http://localhost:4000"

        # Open browser (macOS)
        if command_exists open; then
            open http://localhost:4000
        fi
    else
        warning "Server may still be starting. Check with: docker-compose logs -f"
    fi
}

# Commit and deploy
deploy_to_github() {
    log "Deploying to GitHub..."

    # Add all files
    git add .

    # Commit changes
    git commit -m "🚀 Complete IT Journey setup

- Automated setup using zer0-to-hero script
- Jekyll infrastructure with zer0-mistakes theme
- Docker development environment
- GitHub Pages deployment ready

Built with IT-Journey automation script" || true

    # Push to GitHub
    git push -u origin main

    success "Deployed to GitHub: https://github.com/$GHUSER/$GIT_REPO"

    log "Enabling GitHub Pages..."
    echo ""
    echo -e "${CYAN}Your website will be live at: https://$GHUSER.github.io/$GIT_REPO${NC}"
    echo -e "${CYAN}Enable GitHub Pages at: https://github.com/$GHUSER/$GIT_REPO/settings/pages${NC}"

    # Open GitHub Pages settings
    if command_exists open; then
        open "https://github.com/$GHUSER/$GIT_REPO/settings/pages"
    fi
}

# Create completion summary
create_completion_summary() {
    log "Creating completion summary..."

    cat > completion-summary.md << EOF
# 🎉 IT Journey Complete!

## What You've Accomplished

You've successfully completed your journey from Zer0 to Her0! Here's what you now have:

### ✅ Development Environment
- Visual Studio Code
- Git version control
- Docker containerization
- GitHub CLI

### ✅ Live Website Infrastructure
- Jekyll static site generator
- Professional theme (zer0-mistakes)
- Docker development environment
- GitHub repository with version control

### ✅ Deployment Pipeline
- Automated GitHub Pages deployment
- Local development server
- Container-based development

## Your Resources

- **Local Website**: http://localhost:4000
- **GitHub Repository**: https://github.com/$GHUSER/$GIT_REPO
- **Live Website**: https://$GHUSER.github.io/$GIT_REPO (after enabling GitHub Pages)
- **Project Directory**: $ZREPO

## Next Steps

1. **Customize Your Site**: Edit _config.yml and add content in pages/
2. **Learn Markdown**: Create blog posts and documentation
3. **Explore Jekyll**: Add plugins and custom features
4. **Build Your Portfolio**: Document your learning journey

## Quick Commands

\`\`\`bash
# Start development server
cd $ZREPO && docker-compose up -d

# Stop development server
cd $ZREPO && docker-compose down

# View logs
cd $ZREPO && docker-compose logs -f

# Update and restart
cd $ZREPO && docker-compose down && docker-compose up --build -d
\`\`\`

---

**Congratulations! You're now a developer! 🚀**

*Generated on $(date) by the IT-Journey automation script*
EOF

    success "Completion summary created"
}

# Main execution flow
main() {
    log "Starting IT-Journey Zer0-to-Her0 Complete Setup..."

    # Execute all setup phases
    install_homebrew
    install_development_tools
    setup_environment
    github_authentication
    create_project_structure
    create_github_repository
    create_initial_content
    setup_jekyll_infrastructure
    setup_docker_environment
    build_and_start_website
    deploy_to_github
    create_completion_summary

    # Final success message
    echo ""
    echo -e "${GREEN}🎉 SUCCESS! Your IT Journey is complete!${NC}"
    echo ""
    echo -e "${CYAN}📍 Your website is running at: http://localhost:4000${NC}"
    echo -e "${CYAN}📍 Your repository: https://github.com/$GHUSER/$GIT_REPO${NC}"
    echo -e "${CYAN}📍 Your project: $ZREPO${NC}"
    echo ""
    echo -e "${PURPLE}Next: Enable GitHub Pages to make your site live on the internet!${NC}"
    echo -e "${PURPLE}Visit: https://github.com/$GHUSER/$GIT_REPO/settings/pages${NC}"
    echo ""
    echo -e "${YELLOW}Welcome to the developer community! 🚀${NC}"
}

# Execute main function
main "$@"
Running the Complete Setup
You can execute this entire guide in four ways:
Method 1: Auto-Generated Script (Recommended)
# Generate and run script directly from this markdown file
curl -fsSL https://raw.githubusercontent.com/bamr87/it-journey/main/scripts/generate-zer0-script.sh | bash && ./scripts/zer0-to-hero-generated.sh
Why This Method?
- Always Up-to-Date: Script is generated from the latest zer0.md content
- Self-Documenting: Commands stay in sync with documentation
- Comprehensive: Includes all commands from this guide
- Intelligent: Organized into logical phases with error handling
Method 2: Direct Execution
# Download and run the standalone complete setup script
curl -fsSL https://raw.githubusercontent.com/bamr87/it-journey/main/scripts/zer0-to-hero-complete.sh | bash
Method 3: Review First, Then Execute
# Generate script locally for review
git clone https://github.com/bamr87/it-journey.git
cd it-journey/scripts

# Generate the comprehensive script
./generate-zer0-script.sh

# Test the generated script first (recommended)
./test-generated-script.sh validate    # Check script syntax
./test-generated-script.sh dry-run     # Preview what it will do

# Review the generated script
cat zer0-to-hero-generated.sh

# Run after review
./zer0-to-hero-generated.sh
🧪 Testing Options:
./test-generated-script.sh validate- Verify script syntax and structure./test-generated-script.sh dry-run- Preview operations without execution./test-generated-script.sh- Interactive testing mode
Method 4: Extract from this Markdown (Legacy)
# Extract the embedded script from this markdown file
curl -fsSL https://raw.githubusercontent.com/bamr87/it-journey/main/scripts/extract-script.sh | bash
./scripts/zer0-to-hero-extracted.sh
Automated Environment Variables
For completely unattended execution, set these environment variables:
# Set your preferences
export GHUSER="your-github-username"
export GIT_REPO="my-awesome-website"
export AUTOMATED=true

# Run the script
curl -fsSL https://raw.githubusercontent.com/bamr87/it-journey/main/scripts/zer0-to-hero-complete.sh | bash
What the Automated Script Does
- 🔍 Validates Prerequisites: Checks macOS, internet connection
- 📦 Installs Tools: Homebrew, Git, GitHub CLI, Docker, VS Code
- ⚙️ Configures Environment: Sets up variables and Git identity
- 🐙 Creates Repository: GitHub repo with Jekyll gitignore and MIT license
- 🏗️ Builds Infrastructure: Jekyll setup with zer0-mistakes theme
- 🐳 Configures Docker: Complete containerized development environment
- 🚀 Starts Website: Local development server at http://localhost:4000
- 📤 Deploys: Pushes everything to GitHub for Pages deployment
- 📋 Creates Summary: Comprehensive completion guide and next steps
Emergency Recovery
If something goes wrong during automated setup:
# Reset Docker environment
docker-compose down && docker system prune -f

# Reset Git repository
cd ~/github && rm -rf my-it-journey
git clone https://github.com/YOURUSERNAME/YOURREPO.git

# Restart from specific phase
export PHASE=docker && ./zer0-setup.sh

# Full reset and retry
brew uninstall --ignore-dependencies git gh docker && ./zer0-setup.sh
🎯 You’ve successfully completed your journey from Zer0 to Her0! This guide has equipped you with professional development skills, a live website, and the foundation for an entire IT career. Keep building, keep learning, and welcome to the developer community!